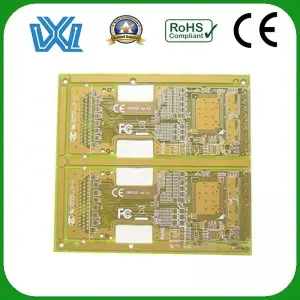
Soldering is a basic skill that every electronics hobbyist must have. Whether you’re a hobbyist or a professional, it’s crucial to know how to solder on a PCB. It allows you to connect components, create circuits and bring your electronic projects to life. In this blog, we’ll explore the step-by-step process of soldering on a PCB, as well as some tips and tricks for achieving professional results.
1. Gather the necessary tools:
Before starting the welding process, it is crucial to gather all the necessary tools and materials. This includes a soldering iron, solder wire, flux, wire cutters, tweezers, a desoldering pump (optional), and safety equipment such as goggles and gloves.
2. Prepare PCB board:
First prepare the PCB board for soldering. Check the circuit board for any defects or damage and make sure it is clean and free of dust and debris. If necessary, use alcohol or PCB cleaner to remove any contaminants. Also, organize the components and determine their correct location on the board.
3. Soldering iron tin plating:
Tin plating is the process of applying a thin layer of solder to the soldering iron tip. This improves heat transfer and ensures better welding. Start by heating the soldering iron to the desired temperature. Once heated, apply a small amount of solder to the tip and wipe off the excess using a damp sponge or brass cleaner.
4. Apply flux:
Flux is an important ingredient that aids in soldering by removing oxides from the surface and promoting better wetting. Apply a small amount of flux to the solder joint or area where the component will be soldered.
5. Welding components:
Place the components on the PCB board ensuring proper alignment. Then, touch the soldering iron to both the component leads and the pads. Hold down the soldering iron for a few seconds until the solder melts and flows around the joint. Remove the soldering iron and allow the solder joint to cool and solidify naturally.
6. Ensure proper joint quality:
Inspect the solder joints to ensure they are of high quality. A good solder joint should have a shiny appearance, indicating a strong connection. It should also be concave, with smooth edges and no excess welding. If necessary, use a desoldering pump to rework any unsatisfactory joints and repeat the soldering process.
7. Post-weld cleaning:
After completing the soldering process, it is crucial to clean the PCB board to remove flux residue or solder spatter. Use isopropyl alcohol or a specialized flux cleaner and a fine brush to gently clean the board. Allow to dry completely before further testing or processing.
Soldering on a PCB may seem daunting at first, but with proper technique and practice, it becomes a skill that opens up endless possibilities in the world of electronics. By following the step-by-step process mentioned in this blog and incorporating the recommended tips, you can achieve professional results and ensure the success of your electronics projects. Remember, practice makes perfect, so don’t be discouraged by the initial challenge. Embrace the art of welding and let your creativity fly!
Post time: Oct-06-2023

